Here is how to install the Level 1 Firebird Speaker Package which is
the same process for all the
different levels
Door Panel Removal:
For the front door speakers you do not use the crossovers that
come with the speakers. The Monsoon already separates frequency. All you do is remove the panel:
http://www.firebirdnation.com/pdf/doorpanel.pdf
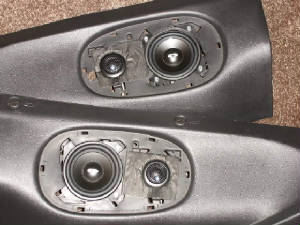
Front: CL-61CV.2 Speakers
Once it is removed the speakers can be
accessed and removed. The connector attached to the midbass in the door is cut off and reused with the new midbass by either
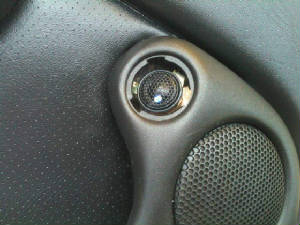
soldering or using crimp connectors to attach it. The tweeter is inside the door panel itself and is removed by removing the
Phillips head screw holding it in place and then prying it away from the metal bracket. It is glued in place but will pop
loose with a flat blade screw driver.
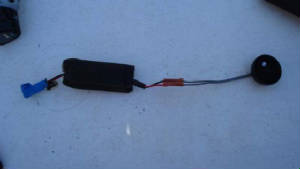
Cut the harness off the factory tweeter including the foam covered
rectangle attached to it as that is the bass blocker/filter for the factory Monsoon system. Without this low frequency
will be allowed to go to the tweeter and cause crackling and popping. If the factory filter is damaged, this will also cause
this type of sound with the new tweeters as well, so keep this in mind. The CDT tweeter will be attached to the metal
bracket using some 3M double sided trim tape. It has a red backing and is gray. This is the same tape that is used to hold
emblems on cars so it will hold indefinitely.
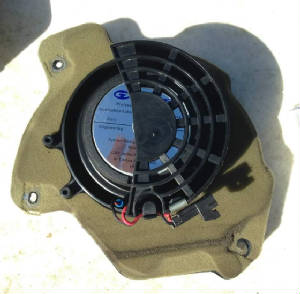
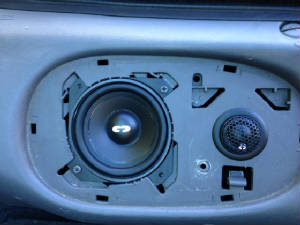
Sail Panel Subwoofers:
The sail panels are much easier. Remove the grill and remove the stock subs and unplug it. Cut the stock connector off the
back. You will see that one pair of wires is longer then the other. This can help you pick which pair goes to which voice
coil on the back of the Bazooka subs. To install you can solder or use crimp on connectors. You can reuse the stock screws
and if you screw them in a little on each before putting them all the way in, they will go in easier and seat better. If you
have problems you can just use a #6 speed nut found at the parts store where the screws and bolts are.
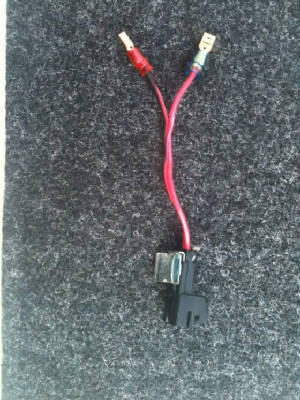
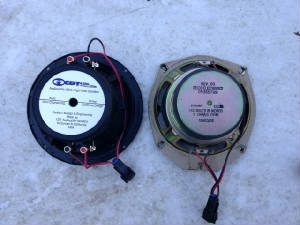
HD-6M DVC Sail Panel Subwoofers:
If
you have the package Level 2 and up using the CDT Audio subwoofers, then your install got a little easier. Again, remove the
stock subwoofer from it's location using the nut driver or 1/4" drive set. Cut the connector off the back of the stock
sub at the solder joints. Strip the ends of the connector where you cut them off with wire strippers and twist the ends. Insert
the connector wires into the terminals on the new CDT sub by pressing the terminal in and holding it there, slide the wire
into it and let go of the terminal. They are spring loaded so they lock the wire in place. Red is pos and black is neg. If
you have a condition where the subs sounds "quiet", you have reversed the polarity on one of the terminals or you
don't have both sides installed yet.
Rear Hatch:
The rear hatch speakers are also fairly easy. You remove the rear hatch plastic by popping it
loose on the drivers side and turning the plastic screws on the passenger side. Then remove the grills on the hatch speakers.
You drill out the rivets holding the stock speaker in place. You can leave the stock tweeter alone. Slide the stock midbass
out and slide in the CDT speaker. It can be retained by a small screw or nut and bolt. Only one would really be necessary.
The stock tweeter can be left unplugged or plugged in. Either way works.
If you
are using the CL-4EX 4", all you have to do is rotate the speaker left or right until the speaker holes are now lining
up with plastic underneith it so that you can now run screws into that instead. This actually holds the speaker in better
then using nuts and bolts.
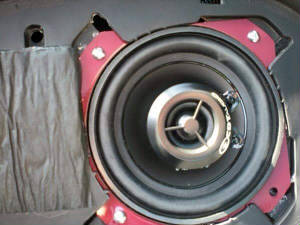
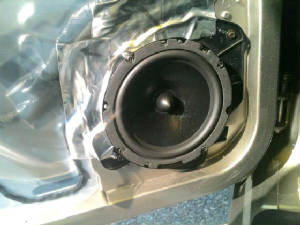
Level 3-5 Door Speaker Install for the KA-61.2 and ES-06.2 door speakers
The install is the
same for these as the ones above with the following exception. These are the largest speaker you can fit in a stock Firebird
mount. In fact at first they look like they will not fit and actually when you sit them in the mount won't. I have done this
install over a hundred times so bare with me. These were in my own Firebirds stock mount as well. To install these in your
mount, you must first, bend the pos and neg terminals back toward the magnet so that they are flat or even bent back a little.
The way they come from CDT is that they are bent outward away from the speaker and will hit the stock mount thus not allowing
it to seat in the mount. If you CAREFULLY bend the terminals back in a downward motion toward the magnet, it will create enough
clearance for the speaker to seat in the mount....but not all the way.
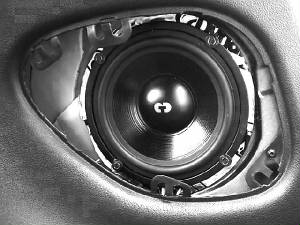
You now have the speaker sitting in the mount but not all the way because it appears the frame is hitting it all
the way around. Probably sitting out about 1/4" or slightly less. Put your screws in each corner, but now all the way
in. Just a little bit at a time all the way around. Then go around to each one tightening it a little but at a time. The best
way is to go across like you would lugnuts tightening them down a little at a time. If you tighten one down all the way on
the first one, it will not fit and will screw up the entire process. When you are done tightening them down a little at a
time, you will see the speaker sit down inside the mount completely. I know, it's like magic.
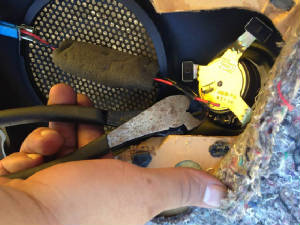
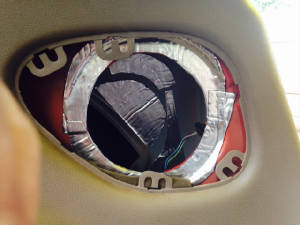
Level 5 ES-06+ DVC Subwoofer Installation
The first thing you must do to make these go into the hole where the sail panel subwoofer goes is to remove
the rubber cover on the magnet. It just peels off and is not secured on by anything. This will make the necessary depth for
these to go into the opening. These are the largest subwoofer you can fit into the sail panel location in a fourth gen F-Body
so the frames on these subwofers do have 6 holes instead of the ususal 4 that normal speakers would have. These are not normal
speakers, they are subwoofers first of all and the larger a subwoofer gets, the more holes are needed to secure it properly
to it's mounting surface. True of all subwoofers. So that being said you will need to make new holes for these to secure to.
The easiest and quickest way to do this that also secures them solidly to the mounting surface is to use a self tap screw
or sharp pan head screw. Either will work perfectly and I use them all the time. I do use sound deadener for all of thes subwoofers
in the sail panel area, with these I highly recommend it as well.
INSTALL PICTURES BELOW