Installation for the Level 1-3 is almost exactly the same for the Camaro installation. Here
we go!
Doors:
Remove the door panel using this guide from Brent Franker:
http://www.shbox.com/page/windowmotor.html
Note: you do not use the supplied crossover with this installation, the Monsoon system filters the
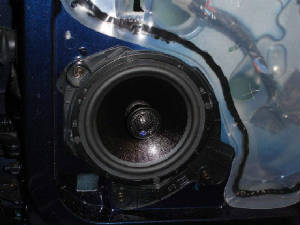
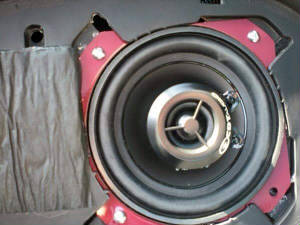
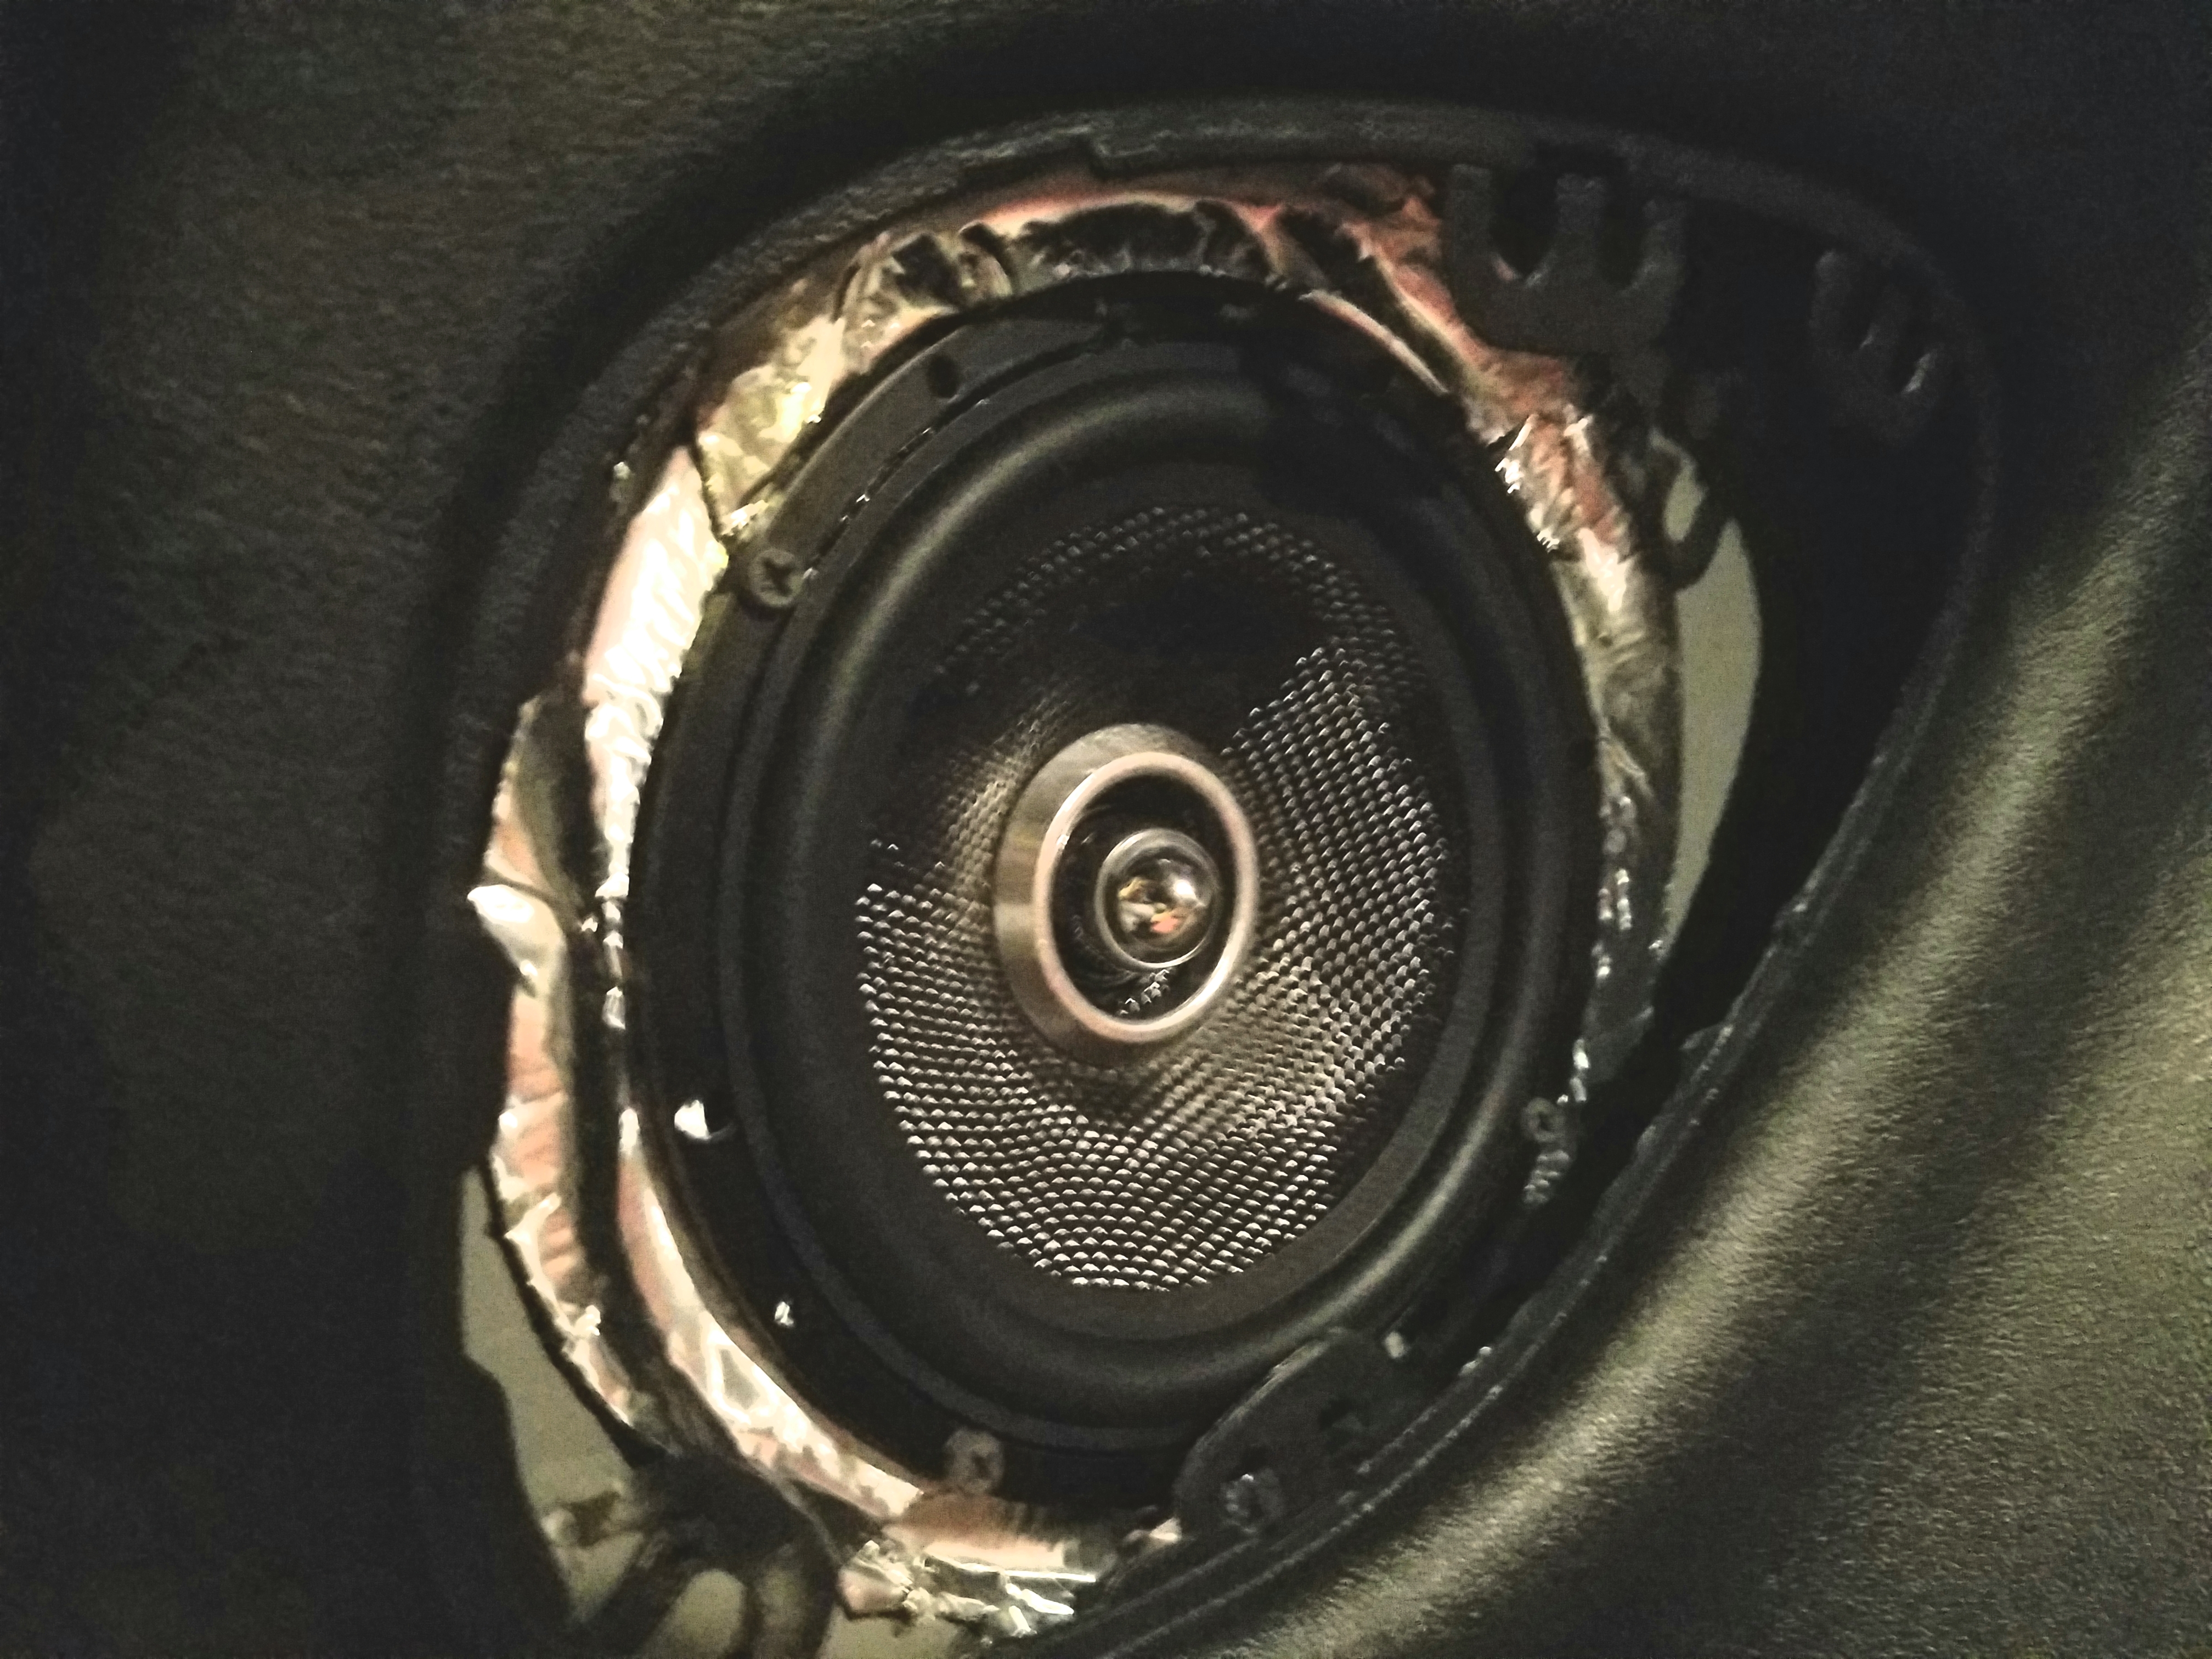
sound already. Once the panel is off you can now remove the door speaker mount with the speaker in it by using your nut driver
or 1/4" sock set. Disconnect the stock connector from the harness and now remove the speaker from the mount. Note on
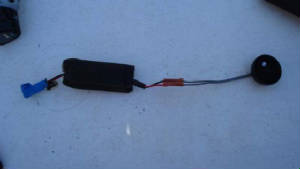
the back of your stock Camaro speaker you have 4 wires. 2 pairs of wires, one pair going one way and one pair going the other
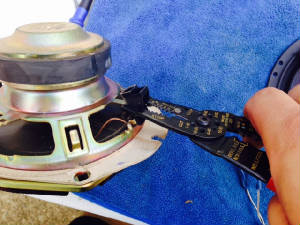
way. One pair os for the tweeter and one pair os for the midbass. You need to mark off the pair that go to the tweeter. You
can peel the felt off the front of the stock speaker and clearly see that one pair goes though the cone and right to the tweeter.
Mark that pair so you know which one they are. Once marked you can cut that off right at the solder joints on the speaker
so you leave plenty of room to work with. You will be reusing this connector off the stock speaker because there is NOT an
aftermarket replacement available.
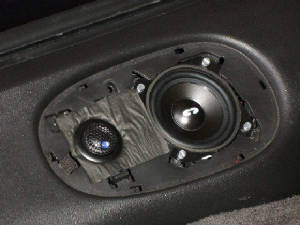
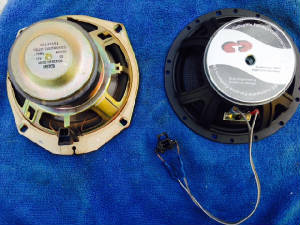
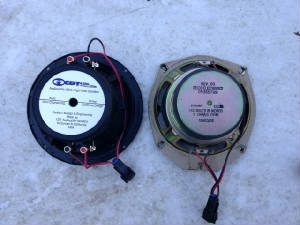
Preparing the new CDT speaker is easy. If you ordered the correct
package you should be looking at the CL-61CV.2 or the KA-61CV.2 or possibly the new ES-60CV.2. Take the midbass driver in
the package and remove the center cap by unscrewing it. There is a box or bag with supplied hardware that will have a small
center post. Take your center post and screw it into thew center of the midbass where the cap was previously. Now take the
tweeter and put the wires through the center of the post and they should come out the back of the magnet. Then place the tweeter
on top of the center post and it will twist on locking in place. You now have your tweeter wires sticking out of the back
of the magnet ready for the stock connectors tweeter wires that you previouly marked. The CDT wires are solid is you pos and
the white stripe is your negative. The stock connector is red for pos and black for neg. Use the female crimp on connectors
for the midbass and the scotch locks or butt connectors for the tweeter wires. Once you have it wired, put the speaker back
in the stock mount and reinstall by plugging it back into the stock harness. Before putting the panel back on, turn on the
radio and test it to make sure you are getting sound. Also, you can aim the tweeter at this point in an upward position.
Sail Panels:
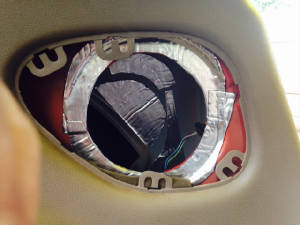
Remove the Sail panel grill and remove the screws. Take out the stock sail
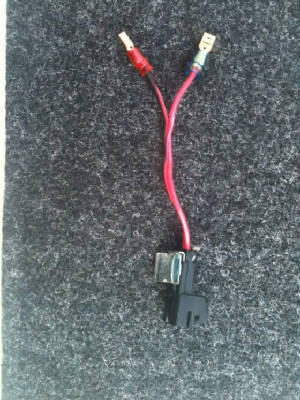
panel and unplug the connector from the harness. The take the stock sub and a pair of pliers. Twist the stock connector
off the back of the stock speaker and cut the wires leaving a little length so that you can reattach it to the new subwoofer.
The tweeter wires from the door install are much too long so you can trim some of that off and use it for this part of the
install to lengthen the wires making it easier to work with. If you are using the CL-6M you will just go pos to pos and neg
to neg then reinstall the subwoofer by plugging the stock connector you attached to the new speaker into the stock harness.
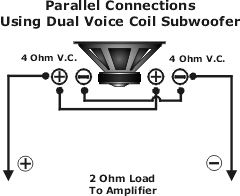
HD-6M DVC Subwoofers have 2 sets of positive and negative terminals. This is so you can wire them in parallel to
acheive the correct 2ohm load. To wire in parallel you put a wire from the positive terminal on one side to the positive terminal
on the other side. Then a wire from the negative terminal on one side to the negative terminal on the other side. the subwoofer
is now wired in parallel. You then pick a side, doesn't matter which, and put wires going from that side to the terminal you
took off of the stock subwoofer.
Rear Hatch Speakers:
The rear hatch speakers
are also fairly easy. You remove the rear hatch plastic by popping it loose on the drivers side and turning the plastic screws
on the passenger side. Then remove the grills on the hatch speakers. You drill out the rivets holding the stock speaker in
place. Slide the stock midbass out and slide in the CDT speaker. It can be retained by a small screw or nut and bolt.
Run a crew or nut and bolt through both sides where the stock rivets used to be and this will secure the speaker in place.
Level 5 ES-06+ DVC Subwoofer Installation
The first thing you must do to make these go into the hole where the sail panel subwoofer
goes is to remove the rubber cover on the magnet. It just peels off and is not secured on by anything. This will make the
necessary depth for these to go into the opening. These are the largest subwoofer you can fit into the sail panel location
in a fourth gen F-Body so the frames on these subwofers do have 6 holes instead of the ususal 4 that normal speakers would
have. These are not normal speakers, they are subwoofers first of all and the larger a subwoofer gets, the more holes are
needed to secure it properly to it's mounting surface. True of all subwoofers. So that being said you will need to make new
holes for these to secure to. The easiest and quickest way to do this that also secures them solidly to the mounting surface
is to use a self tap screw or sharp pan head screw. Either will work perfectly and I use them all the time. I do use sound
deadener for all of thes subwoofers in the sail panel area, with these I highly recommend it as well.
INSTALL
PICTURES BELOW